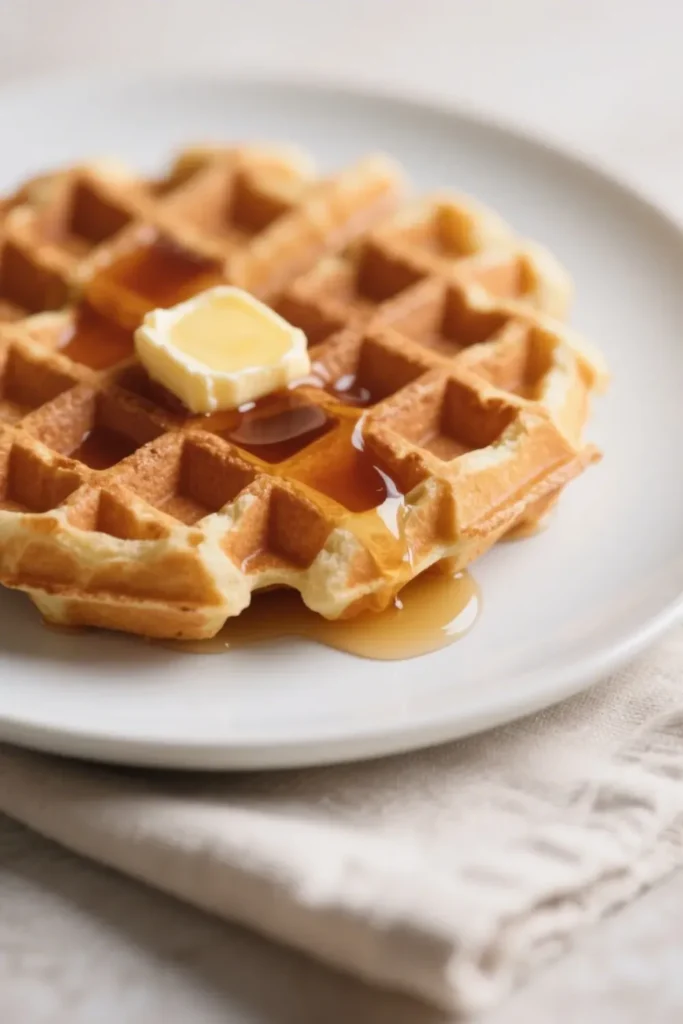
These light, airy waffles are prepared with an old-fashioned overnight yeast batter that develops rich flavor and an irresistible crisp exterior. As a longtime fan of classic breakfast traditions, I love how the slow fermentation brings out a subtle tanginess and beautiful golden crust. Perfect for lazy weekend mornings, they deliver a depth of flavor you won’t get from chemical leaveners alone.
| American Cuisine |
| Breakfast or Brunch |
| By Adam Rossi |
Ingredients:
Yeast Batter Base:
2 cups milk
1 (¼-oz) package active dry yeast (about 2¼ teaspoons)
Scald and Cool Milk:
Pour 2 cups of milk into a small saucepan. Heat over medium until it just begins to steam and tiny bubbles form around the edges (scalded). Remove from heat and allow to cool until lukewarm (about 110°F / 43°C).
Activate Yeast:
In a large mixing bowl, pour ½ cup warm water (110°F / 43°C). Sprinkle the active dry yeast over the surface and let sit for 5 minutes, or until foamy. If it doesn’t foam, discard and start with fresh yeast.
Combine Batter Base:
To the bowl with the activated yeast, stir in the lukewarm milk, ⅓ cup melted butter, 1 teaspoon salt, 1 teaspoon sugar, and 3 cups all-purpose flour. Using a rotary beater (or electric mixer with the paddle attachment), mix on low speed until the batter is smooth and free of lumps. The consistency should be thick but pourable—similar to a heavy pancake batter.
First Rise / Overnight Rest:
Cover the bowl tightly with plastic wrap or a clean kitchen towel. Let the batter rest at room temperature (68–75°F / 20–24°C) overnight (8–12 hours). During this time, the yeast will ferment, producing subtle flavor and improved texture.
Prepare to Cook:
When ready to bake (morning of serving), preheat your waffle iron according to manufacturer instructions. In a small bowl, lightly beat 2 eggs, then gently whisk the eggs and ½ teaspoon baking soda into the fermented batter until fully combined. The batter will lighten and become slightly bubbly.
Cook Waffles:
Lightly grease the waffle iron (spray or melted butter). Scoop about ¾–1 cup of batter (depending on your waffle iron’s size) onto the center of the hot plates. Close and cook until waffles are golden brown and crisp—usually 3–4 minutes. Carefully remove and keep warm on a wire rack set in a low oven (200°F / 93°C) while cooking the remaining waffles.
Chef's Tips:
Temperature Matters: Ensure milk and water are no hotter than 110°F (43°C) to avoid killing the yeast. Use an instant-read thermometer if uncertain.
Check Batter Consistency: If the batter seems too thick after resting (sometimes it stiffens), gently stir in up to 2 tablespoons of milk or water to loosen before adding eggs and baking soda.
Crispier Waffles: After cooking, place each waffle directly on a cooling rack (not a plate) to prevent steam from making them soggy.
Classic Maple: Serve warm waffles with real maple syrup, a pat of butter, and a dusting of powdered sugar.
Berry & Cream: Top with fresh mixed berries (strawberries, blueberries, raspberries) and a dollop of whipped cream or Greek yogurt.
Savory Twist: Add crispy bacon bits and shredded cheddar cheese to the batter before cooking; finish with a fried egg and a sprinkle of chives.
Storage:
Batter Storage: If you need to shorten prep, you can refrigerate the mixed batter overnight (up to 24 hours). Return to room temperature for 30 minutes before adding eggs & soda.
Cooked Waffles: Store cooled, fully cooked waffles in an airtight container in the refrigerator for up to 3 days. Reheat in a toaster or 350°F (175°C) oven for 5–7 minutes to restore crispness.
Freezing Option: Flash-freeze cooled waffles in a single layer on a baking sheet. Once firm, transfer to a freezer bag for up to 1 month. Reheat directly from frozen in a 375°F (190°C) oven for 8–10 minutes.
Vegan Version: Replace milk with unsweetened soy or almond milk; swap melted butter for melted coconut oil or vegan margarine; substitute eggs with “flax eggs” (2 tablespoons ground flaxseed + 6 tablespoons water, mixed and rested 5 minutes). Use a pinch more baking soda to help with lift.
Gluten-Free Option: Use a 1-to-1 gluten-free flour blend that contains xanthan gum. Note that the batter may be slightly denser; let rest uncovered in the fridge for 30 minutes before cooking to hydrate the flour properly.
Dairy-Free Variation: Substitute the milk with unsweetened oat or rice milk; replace butter with melted coconut oil or dairy-free butter alternative.